| The
first thing you should do is unpack your ATX case. Take
off the cover of your case so that you can access the
inside. Place the case on a desk so that you are looking
down towards the open case. Your case should come with
motherboard mounting screws. If your ATX back plate
it not already fitted you can fit it by placing your
plate near the ATX back plate cut out and pushing the
plate outwards, it should clip on.
Now
place your motherboard on top of the mounting screw
holes. Make sure your ATX devices on the motherboard
such as PS/2 and parallel port are facing towards ATX
back plate cut out. Gently push your motherboard towards
the cut out, every devices should fit easily into its
corresponding cut out, as shown below.
The
screw holes on your motherboard should align with the
screw holes on your case. Place your screws that came
with the case into the appropriate holes and gently
screw it on using a screw driver.
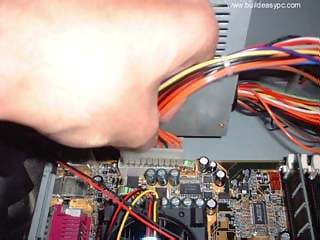
The
motherboard is now securely mounted to the case. You
can now place the ATX power connector to the motherboard.
Your ATX case should come with a power supply unit (PSU)
and should already be mounted to the case. The ATX power
connector is shown on image below.
Place
the ATX power connector on top of the power socket on
the motherboard. Push down the power connector and it
should clip onto the socket. If you try to fit the power
connector the wrong way round, it won't fit, it will
only fit one way. So, if the power connector does not
go in, it should go in the other way round. |